
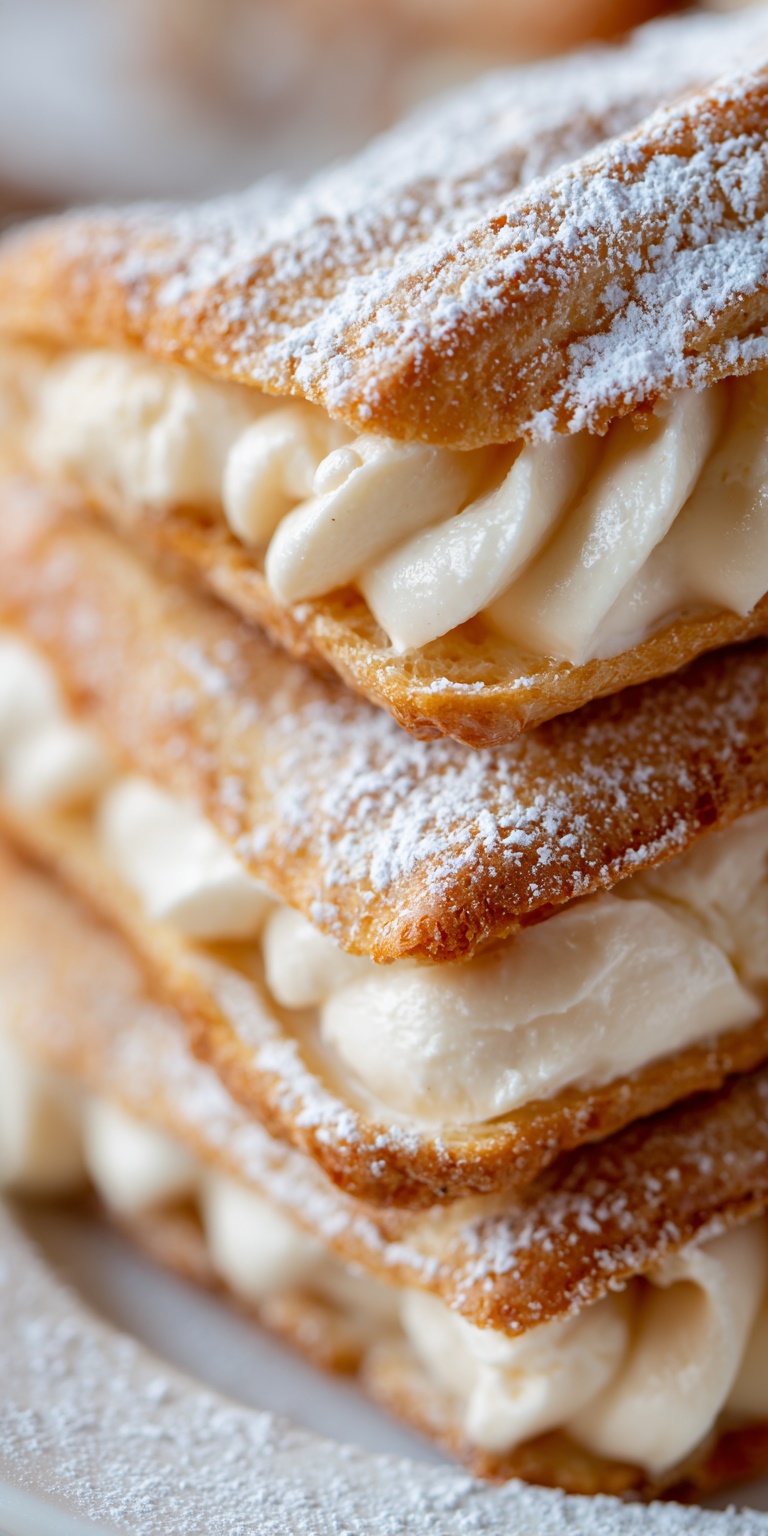
There’s something incredibly special about a dessert that combines the lightness of cake with the rich, creamy filling of a classic cannoli.
This cannoli cake is tender, flavorful, and layered with a sweet ricotta-mascarpone filling, making it perfect for celebrations or a weekend indulgence.
Why You’ll Love This Recipe
It transforms the flavors of a traditional Italian cannoli into cake form.
The ricotta and mascarpone filling is smooth, creamy, and perfectly balanced.
It looks elegant but is surprisingly easy to prepare at home.
Each bite delivers soft cake, rich filling, and a touch of chocolate crunch.
What You’ll Need (Ingredient Highlights)
All-purpose flour and baking powder give the cake its light structure.
Buttermilk adds moisture and keeps the cake soft.
Ricotta and mascarpone create a luscious, authentic cannoli filling.
Mini chocolate chips bring a touch of crunch and sweetness.
Orange zest and cinnamon add optional warmth and citrusy fragrance.
Pro Tips Before You Start
Drain ricotta overnight to avoid a runny filling.
Bring butter and eggs to room temperature for smooth batter.
Chill the filling before assembling to make it easier to spread.
Use a serrated knife to level cakes for a neat finish.
Decorate with pistachios or candied fruit for a Sicilian touch.
How to Make Cannoli Cake
Step 1 – Prepare the pans
Preheat oven to 350°F (175°C). Grease and line two 8-inch round cake pans.
Step 2 – Mix the dry ingredients
Whisk together flour, baking powder, and salt in a bowl.
Step 3 – Cream butter and sugar
Beat butter and sugar until light and fluffy.
Add eggs one at a time, then stir in vanilla.
Step 4 – Combine wet and dry
Add dry mixture alternately with buttermilk, mixing until smooth.
Step 5 – Bake the cakes
Divide batter into pans and bake 28–30 minutes, until a toothpick comes out clean. Cool completely.
Step 6 – Make the filling
Mix ricotta and mascarpone until smooth.
Add sugar, vanilla, zest, and cinnamon. Fold in chocolate chips. Chill 1 hour.
Step 7 – Assemble the cake
Level cake layers, spread filling between them, then frost top and sides.
Step 8 – Decorate and serve
Garnish with mini chocolate chips, pistachios, and powdered sugar.
What to Serve It With
Pair with espresso or cappuccino for a true Italian experience.
Serve with fresh berries for a bright contrast.
Add a glass of dessert wine like Vin Santo for special occasions.
Variations / Substitutions
Swap mascarpone with cream cheese for a tangier filling.
Use almond extract instead of vanilla for a nutty twist.
Add candied orange peel for extra flavor.
Make cupcakes instead of a full cake for individual servings.
Storage & Leftovers
Refrigerate covered for up to 3 days.
Freeze unfrosted cake layers for up to 2 months.
Assembled cake can be frozen (well wrapped) for up to 1 month.
FAQs
Can I make the cake layers ahead of time?
Yes, bake and store them wrapped in plastic up to 2 days in advance.
Do I have to drain the ricotta?
Yes, draining ensures the filling is thick and not watery.
Can I use store-bought cannoli cream instead?
You can, but homemade tastes fresher and richer.
Can I make this without mascarpone?
Yes, substitute cream cheese, though the flavor will be slightly tangier.
What’s the best way to decorate?
Use mini chocolate chips, crushed pistachios, or candied fruit.
How do I prevent the cake from drying out?
Do not overbake; check for doneness a few minutes early.
Can I make it gluten-free?
Yes, use a 1:1 gluten-free flour substitute.
How long should I chill the filling?
At least 1 hour; longer helps it set even better.
Can I make this into a sheet cake?
Yes, bake in a 9×13 pan for about 35–38 minutes.
Is this cake very sweet?
It’s moderately sweet, balanced by the creamy ricotta filling.
Final Thoughts
This cannoli cake is everything you love about a classic Italian pastry in a beautiful cake form.
It’s rich, creamy, and unforgettable—perfect for holidays, birthdays, or anytime you want to impress.