
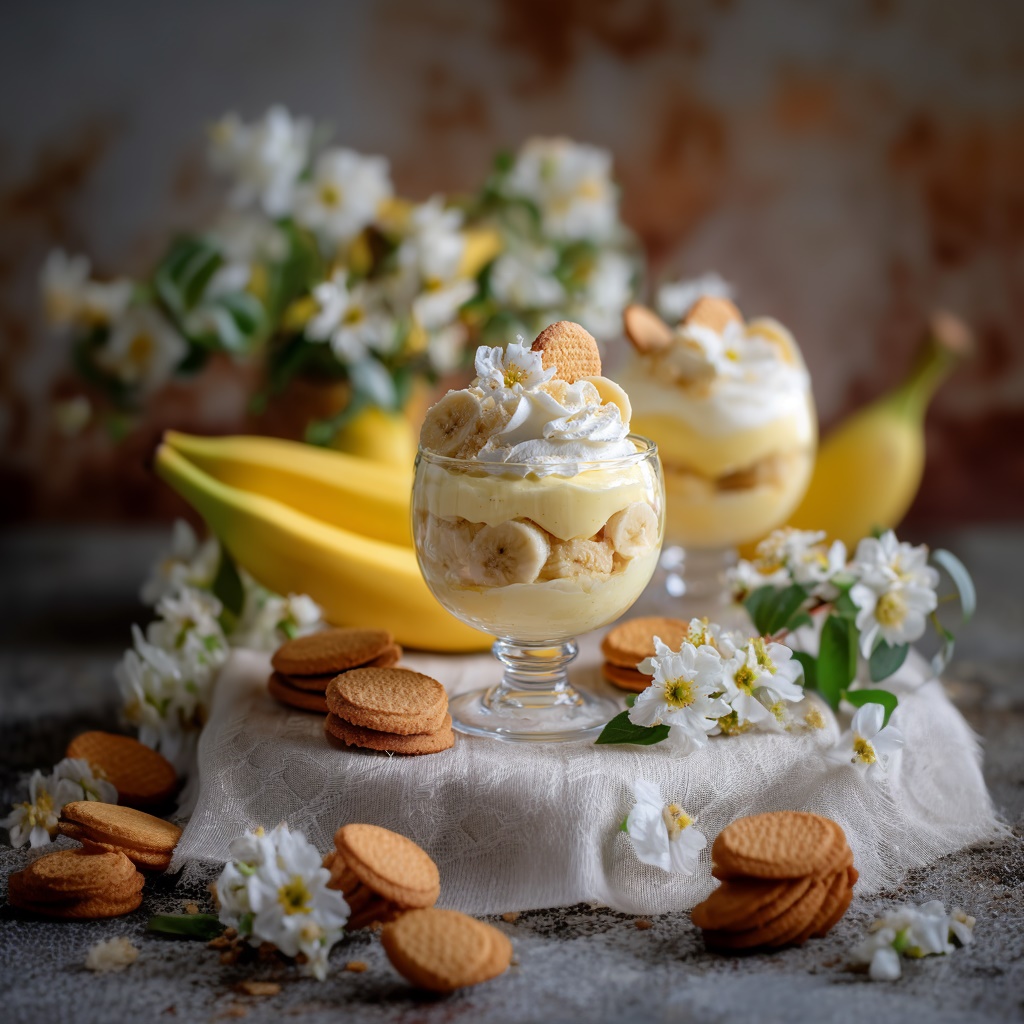
There’s something so comforting about a creamy banana pudding layered with wafers and fresh bananas.
This version skips the condensed milk but still delivers a luscious, homemade flavor that feels nostalgic and indulgent.
It’s the perfect dessert for family gatherings or a cozy night in.
Why You’ll Love This Recipe
It’s made without condensed milk, so the flavor is lighter and fresher.
Homemade pudding adds richness and depth you can’t get from boxed mixes.
It’s layered with bananas and Nilla wafers for the classic texture everyone loves.
The dessert chills beautifully, making it even better the next day.
What You’ll Need (Ingredient Highlights)
Eggs give the pudding its silky texture.
Flour thickens the custard naturally without cornstarch.
Whole milk creates creaminess without being too heavy.
Butter and vanilla add smoothness and flavor.
Barely ripe bananas keep the pudding from becoming overly mushy.
Nilla wafers bring a nostalgic crunch to each bite.
Whipped cream makes a light, fluffy garnish.
Pro Tips Before You Start
Temper the eggs carefully to prevent curdling.
Whisk constantly when cooking the pudding to avoid lumps.
Use bananas that are just turning yellow—overripe bananas become too soft.
Let the pudding cool slightly before layering so the bananas stay fresh.
Chill overnight for the best texture and flavor.
How to Make Banana Pudding No Condensed Milk
Step 1 – Prepare the eggs
Separate 3 egg whites and set aside.
Whisk the 3 yolks with the remaining whole egg until smooth.
Step 2 – Cook the pudding base
Whisk sugar and flour in a saucepan.
Slowly add milk and cook over medium heat, stirring, until thickened and bubbling.
Step 3 – Temper the eggs
Pour a little hot pudding into the eggs while whisking.
Return the mixture to the saucepan and cook gently over low heat.
Step 4 – Finish the pudding
Cook 2–3 minutes, then stir in butter and vanilla. Let cool for 10–15 minutes.
Step 5 – Assemble the pudding
Spread a thin layer of pudding in a casserole dish.
Add wafers, banana slices, then half the pudding. Repeat layers.
Step 6 – Garnish and chill
Top with whipped cream, banana coins, and crumbled wafers.
Chill for at least 2 hours before serving.
What to Serve It With
Pair with hot coffee or tea for a cozy dessert.
Serve with grilled or roasted meats at a picnic for contrast.
Enjoy with fresh fruit for a lighter finish.
Variations / Substitutions
Swap Nilla wafers with shortbread or graham crackers.
Use coconut milk for a dairy-free version.
Layer with strawberries for a fruity twist.
Skip the whipped cream topping if you prefer a lighter pudding.
Storage & Leftovers
Store tightly covered in the fridge for up to 3 days.
Do not freeze, as bananas and custard don’t thaw well.
FAQs
Can I make this pudding without flour?
Yes, you can substitute cornstarch, though the texture will be slightly different.
Do I have to use Nilla wafers?
No, any crunchy cookie works, but Nilla wafers are traditional.
Can I make this dessert ahead of time?
Yes, prepare it the night before and chill—it tastes even better.
What bananas work best?
Barely ripe bananas hold their shape and prevent mushiness.
How do I prevent the bananas from browning?
Layer them quickly with pudding to reduce air exposure.
Can I use non-dairy milk?
Yes, but whole milk provides the creamiest texture.
What size dish should I use?
A 9×13-inch casserole dish works perfectly.
Can I skip the whipped cream topping?
Yes, but it adds lightness and a pretty finish.
Will the pudding thicken more as it chills?
Yes, it sets further in the fridge, making the layers firmer.
Can I serve this warm instead of chilled?
Yes, but the flavors deepen and the texture improves when chilled.
Final Thoughts
Banana Pudding without condensed milk proves that classic comfort food can still taste indulgent and fresh.
With its homemade custard, layers of bananas, and nostalgic wafers, this dessert will quickly become a family favorite.